
How to Get Better Real Estate Photos: 7 Photoshoot Tips for Homes

Highlighting a property's appeal in the real estate market is crucial, from aerial drone captures to virtual walkthroughs. This blog guides you through the essentials of taking top-notch home photos, offering practical tips for preparing for photoshoots and snapping pictures that stand out.
How do you make real estate pictures pop?—A big question facing professional photographers today as 97% of homebuyers search the internet for a new home.
High-quality photos that make a home stand out from the endless number of property listings are in high demand. Property listings featuring high dynamic range (HDR) photos sell 50% faster and increase online views by 118%.
The importance of showcasing a home in the best possible light in the real estate market cannot be understated, from drone aerial shots to virtual tours. In this article, we outline what you need to capture outstanding photographs of homes and walk through some tips to help you prepare for real estate photoshoots and capture pictures that pop.
What you need for real estate photography
You will need the right equipment to shoot photos worthy of a professional real estate photographer.
Here are the essentials you will need to capture high-quality photos that entice homebuyers:
1. Digital camera: The right camera is crucial for real estate photography. Opt for HDR or Digital Single Lens Reflex (DSLR) models to ensure the highest quality images. These cameras have standard features like exposure bracketing and remote flash triggering.
2. Wide-angle lens: A wide-angle lens is a game-changer for interior photography. It can make confined spaces seem larger, enhancing their appeal to potential buyers. If your budget allows, consider investing in a tilt-shift lens to avoid the distortion commonly associated with wide-angle lenses.
3. Tripod: A sturdy tripod is your best option for maintaining level photographs and eliminating motion blur, offering more control over your camera. To maintain consistent perspective in your real estate images, set the tripod at 5 feet.
4. Lighting: Lighting is vital for taking quality images. While many cameras have an integrated flash, a remote flash can help dispel shadows in your images. It's especially beneficial for capturing shots in dimly lit spaces.
5. Remote trigger: A remote trigger is essential to avoid unwanted camera shake when working with slow shutter speeds. It ensures you don't have to touch the camera, offering more stability when capturing photos.
How to prepare for a real estate shoot
With all the proper equipment ready to go, you’ll need to make sure you’re prepared for your photo shoot so you’re ready to capture high-quality images of the home.
Get your shot list ready
Your shot list is your guide for making the most of your photoshoot.
By creating a standard shot list, you can then collaborate with the real estate agent or homeowner to tweak the list for each property depending on what is unique or especially beautiful so the property stands out to potential buyers.
Your standard shot list should look something similar to the following:
- Two or three wide-angle shots of the living room, kitchen, and each bedroom.
- One or two photos of each bathroom.
- Two or three shots of the backyard.
- Two or three shots of the front of the house from at least three different angles.
- One shot of the extra features (garage, laundry, etc.).
Prepare your photography equipment
Before heading to your photoshoot, reviewing your equipment is important.
Familiarize yourself with the basic camera settings and presets beforehand if you're using a new camera. Additionally, it's wise to consider bringing a backup camera if you have one and check that all batteries are fully charged. Take your charger along too, just in case.
Lastly, check that ample storage space is available on your camera's SD card or internal memory before heading off to the property.
Declutter for a camera-ready space
The house needs to be neat and tidy. It’s always a good idea to ask the realtor or homeowner to ensure the property is decluttered and clean.
Doing so ensures that the home is camera-ready when you arrive on site. This includes ensuring surfaces are spotless, ranging from coffee tables to bathroom sinks. If the homeowner or realtor wants to set out decorative items, suggest a minimalist approach so that the interior spaces look clean and uncluttered.
Schedule shoots in the morning or late afternoon
When it comes to real estate photography, selecting the right time of day is crucial to take advantage of precious natural light.
Try to schedule your shoot when the light is soft, which can help avoid glare but still accentuate the home's features. Early mornings or late afternoons offer the best lighting conditions that prevent oversaturation in your photos. Dusk-red or blue skies are great for capturing photos that make a home look inviting to potential buyers.
Go for a pre-shoot walk-through
Before starting your photoshoot, take a walk through the home to get familiar with the floor plan and features.
While exploring the property, start thinking about the best angles for each feature, determining which items need relocating, and assessing the readiness of different spaces.
You can also plan out the sequence of shots, but keep in mind that your goal is to capture the architectural essence of the home rather than the current homeowner’s interior decor.
7 real estate photography tips to take great photos
With your pre-shoot preparations done and dusted, it’s time to start capturing those high-quality images with these seven real estate photography tips.
1. Remove unsightly exterior elements
Removing any distractions that may take away from the home's beauty is essential when capturing the perfect exterior shot.
Remove any unsightly elements, such as trash bins, that could divert the viewer’s attention. By doing this, you can create a clutter-free, focused, and visually appealing image that enables potential buyers to picture themselves in the home.
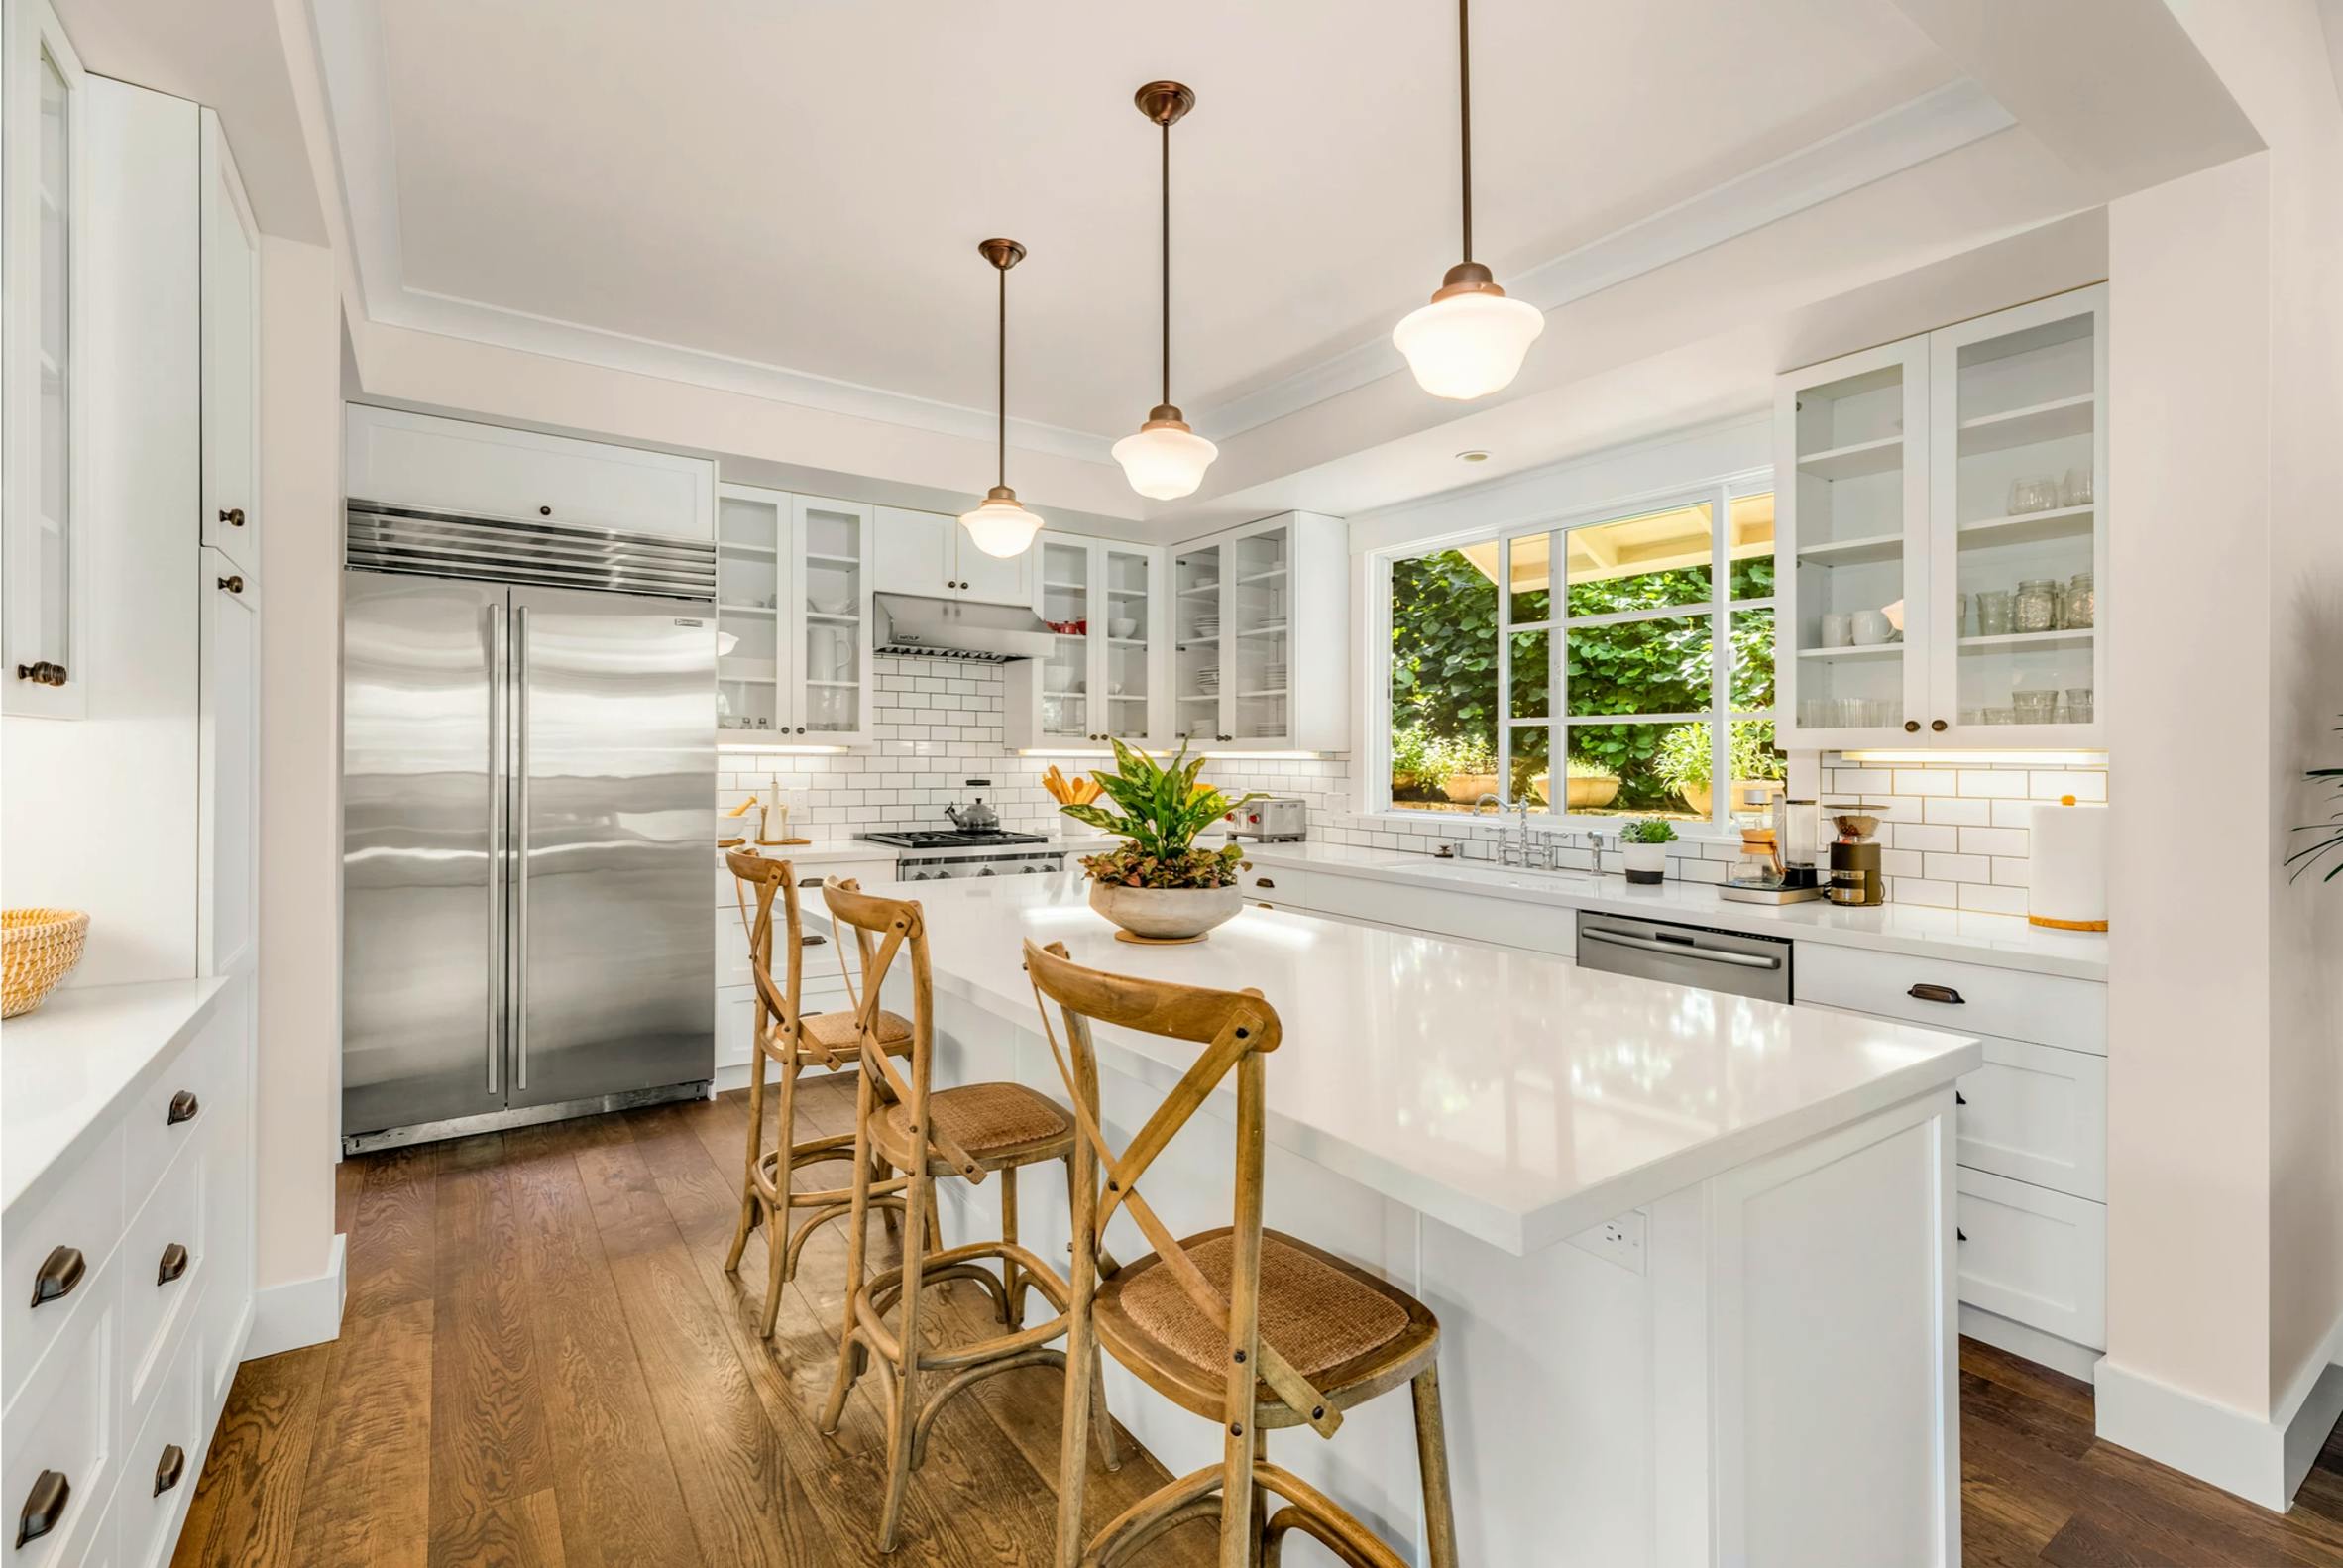
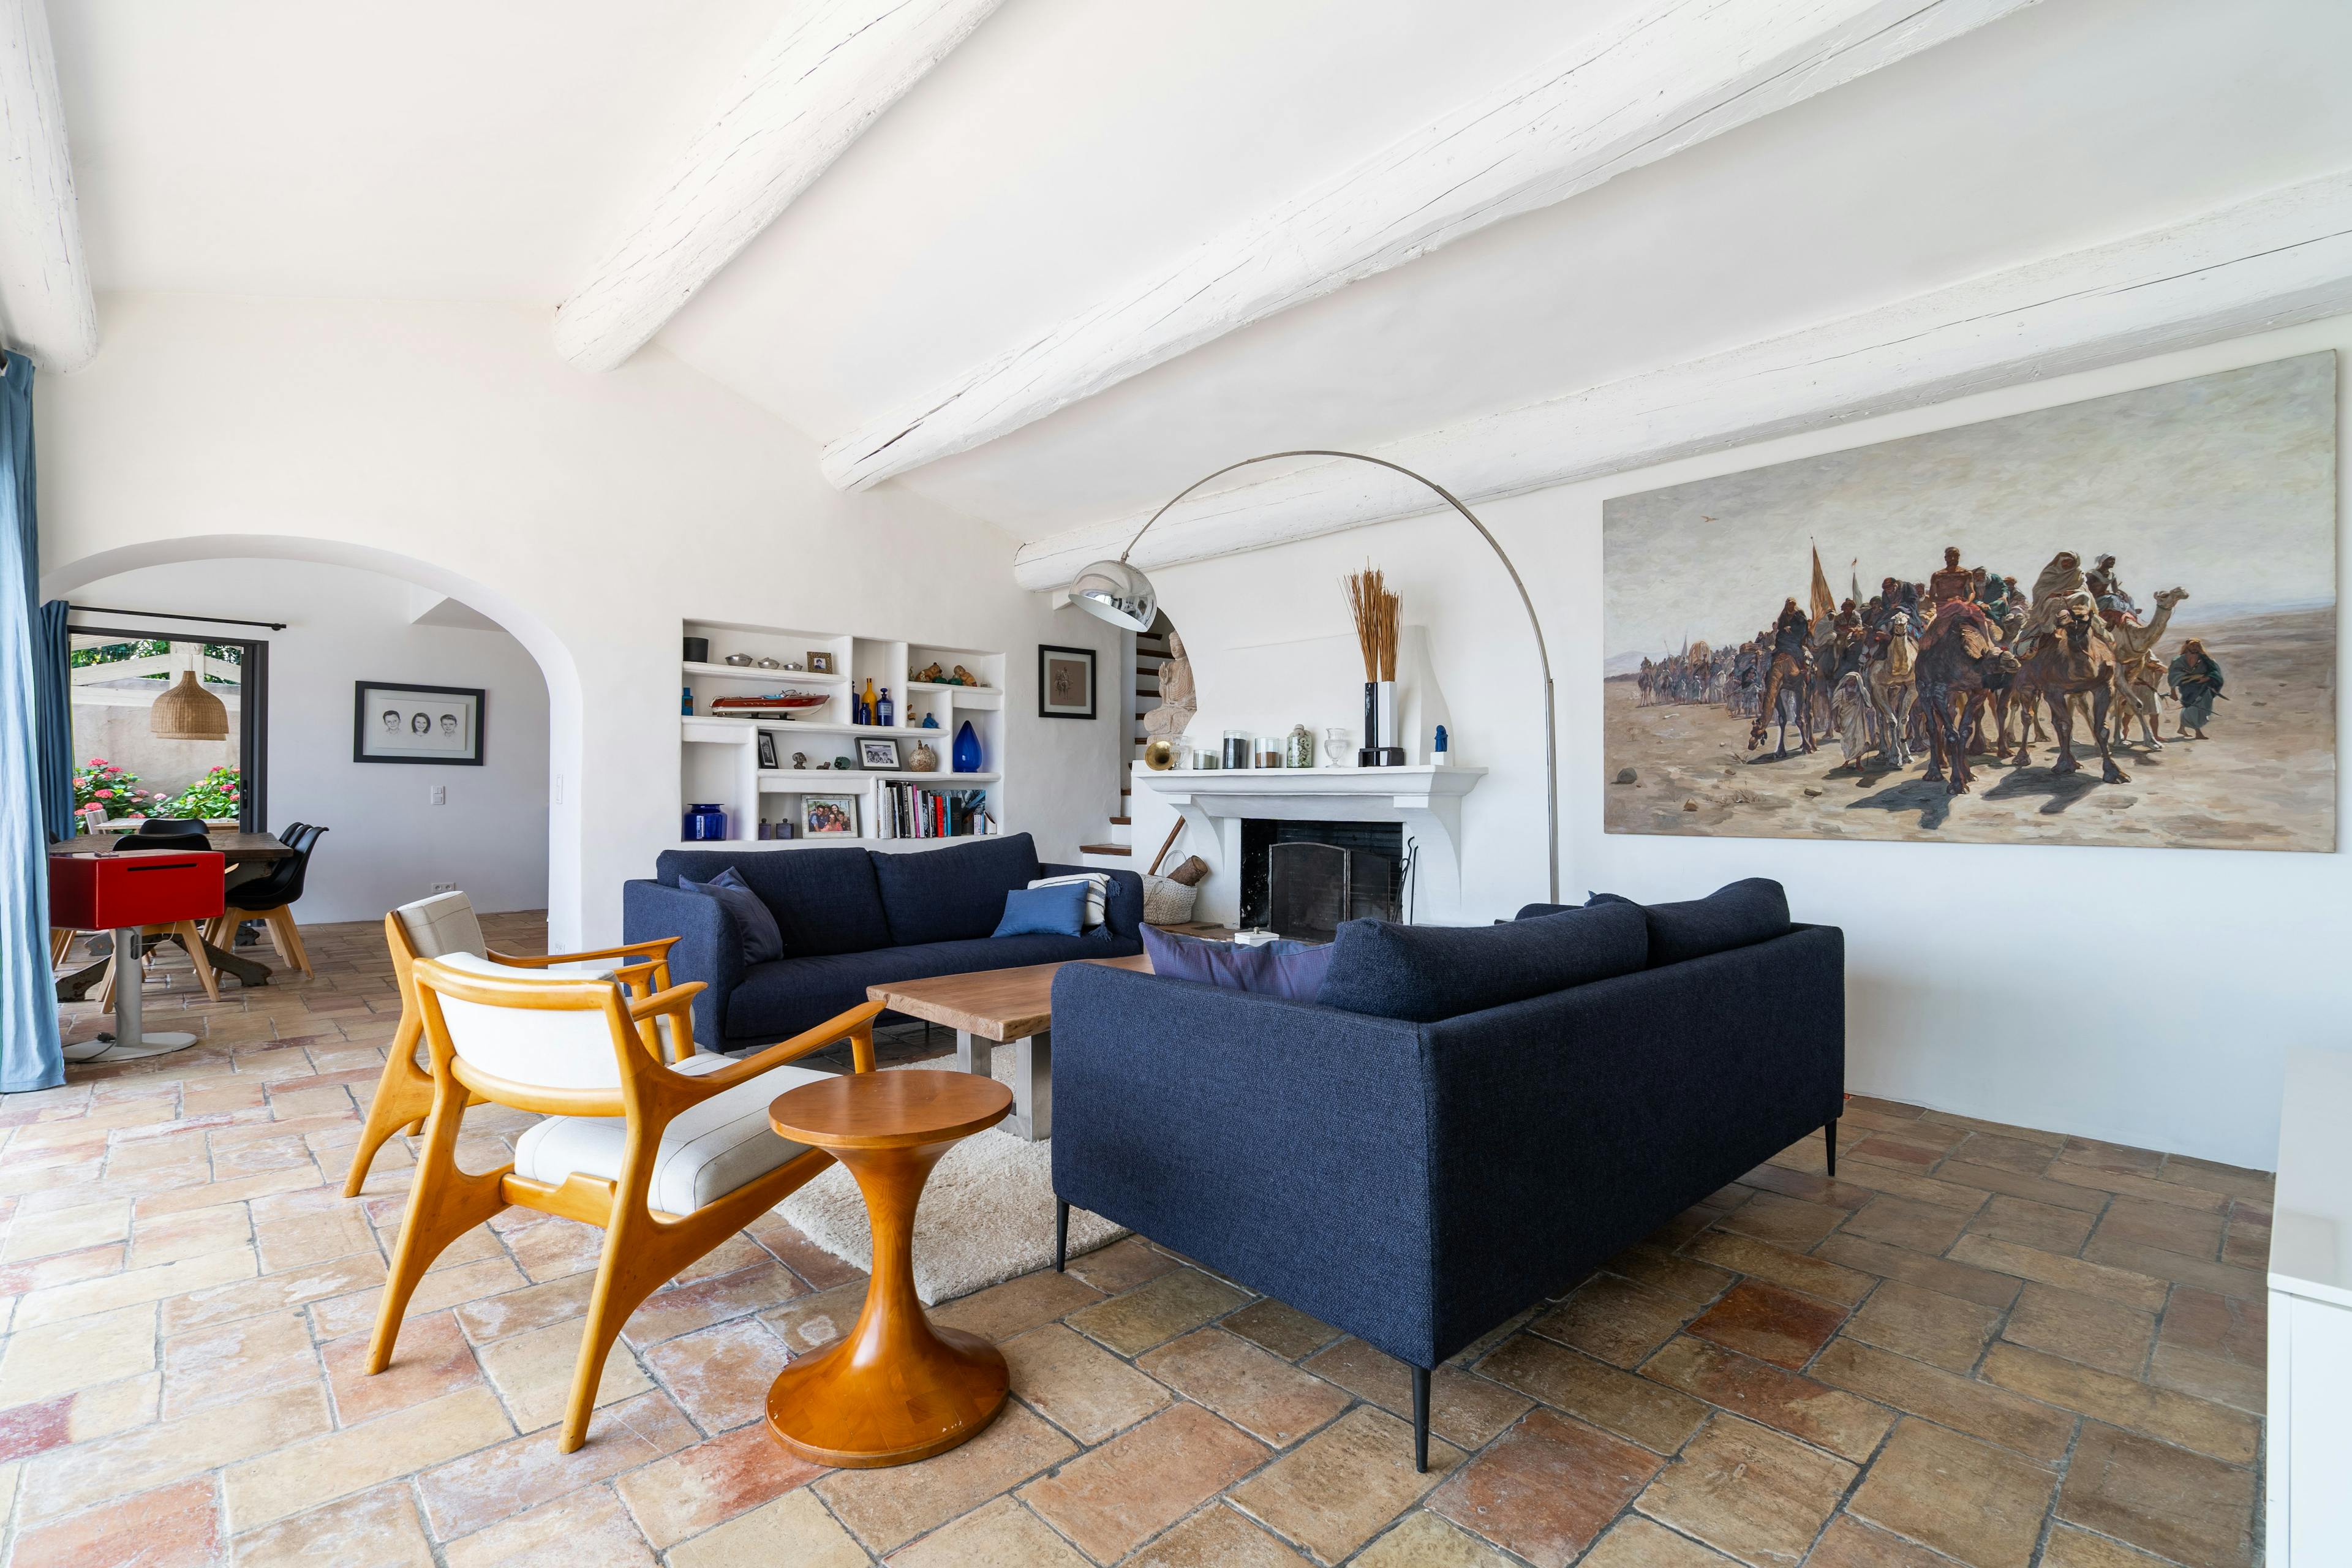
2. Aim for precise interior photos
Attention to detail is crucial for impeccable interior shots and representing rooms in a way that captures the imagination of homebuyers.
Capturing these high-quality shots starts with your tripod, which will help you keep those vertical lines straight. Reduce distortion by keeping your camera level, making those interior shots clear and accurate representations of the space.
3. Check the height of your tripod
When capturing interiors, the height of your tripod is crucial for getting good results.
Setting it at eye level, approximately 5 feet, will help ensure that rooms look proportional and that vertical lines remain straight. Avoid placing the camera too high, which might result in too much ceiling being visible, or too low, which could make the furniture more prominent than the essence of the room.
4. Leverage natural light
Making use of natural light during your shoot will greatly enhance your photos.
For exteriors, aim for early mornings or late afternoons when the light is the softest. A fantastic hack is to turn the property's inside lights on to imbue a warm, welcoming feel to your images.
And for shooting interior spaces, you should maximize natural light by opening blinds and curtains. While a flash can help dispel shadows, be mindful of maintaining a consistent white balance, ideally favoring the natural light.
5. Highlight the standout features
When taking real estate photos, highlight the home’s standout features.
A pristine pool, modern kitchen countertops, a cozy fireplace, or expansive windows are all great hooks for capturing the imagination of homebuyers.
While taking pictures of these critical elements and rooms, choose angles that best emphasize them. Ideally, include three walls in your shots to provide a more comprehensive view of the space.
6. Capture lots of photos
When it comes to pressing that shutter button, don’t hold back. Take lots of photos.
Photographing each space from multiple angles, perspectives, and different exposures broadens your selection options back in ‘the darkroom.’ More is better in this case, and remember, your SD card should be empty at the start of your shoot.
7. Use photo editing apps to polish the final product
With a wide range of shots at your disposal, leverage digital editing software tools like Lightroom or Adobe Photoshop for post-production, polishing the best images you captured into high-quality photos that make real estate listings stick out. Also consider leveraging AI-powered apps to streamline your image optimization.
When post-processing your images, think about carrying out the following tasks to optimize your photos:
- Adjust brightness, contrast, and saturation.
- Crop to improve composition.
- Adjust the white balance.

Take the next step to grow your photography practice
If you’re a photographer looking to take your real estate photography (or any photography) practice to the next level, OCUS can help get you there.
We offer a comprehensive photography solution that covers everything a professional photographer needs, from connecting you to clients to post-production processes supercharged by AI-powered tools. Let us take care of the hard work so you can focus on what you do best. Come check out the OCUS community today!